Tools
Canva, Adobe Illustrator, Blender
Descriptors
Illustrating, Branding, Package Designing, 3D Rendering

Project Context
During Spring semester of my Junior year, I decided I wanted to develop my design skills and learn some new skills specifically through the context of package design while still incorporating research concepts that were important to me. During Spring semester, Miami University's College of Creative Arts holds an event called Sparkfest where students can sell their creative work. The previous year I had sold crochet keychains of animals and this year wanted to turn them into more of a marketed product with their own package design.
For extra detail, blind boxes are type of packaging that keep whatever is within the box a mystery. They typically have a random collectible toy, figure, keychain, etc. and are often based on popular franchises.
Problem
Crochet keychains I have sold in the past didn't have as much interest when they were sitting on a table during Sparkfest.
Solution
Creating a blind box packaging design that made the keychains feel more complete and created intrigue about what customers would receive.
Concept Sketching


After picking a concept I wanted to go with, I created a mood board that I could reference while designing the packaging.

Dieline Sketching
I then got a dieline template from templatemaker.nl. As pictured below, I altered the template a little bit to account for bleed and ensure the dieline was set up properly within Illustrator.

Next, I made a rough sketch of my design on paper, referencing the dieline as I needed. I then scanned the sketch and placed it within my dieline in Illustrator.

First Dieline Iteration
Using the sketch, I made a rough, shape based version of my blind box design.

Following the basic shapes, I worked on adding more visual interest with gradients and opacity.

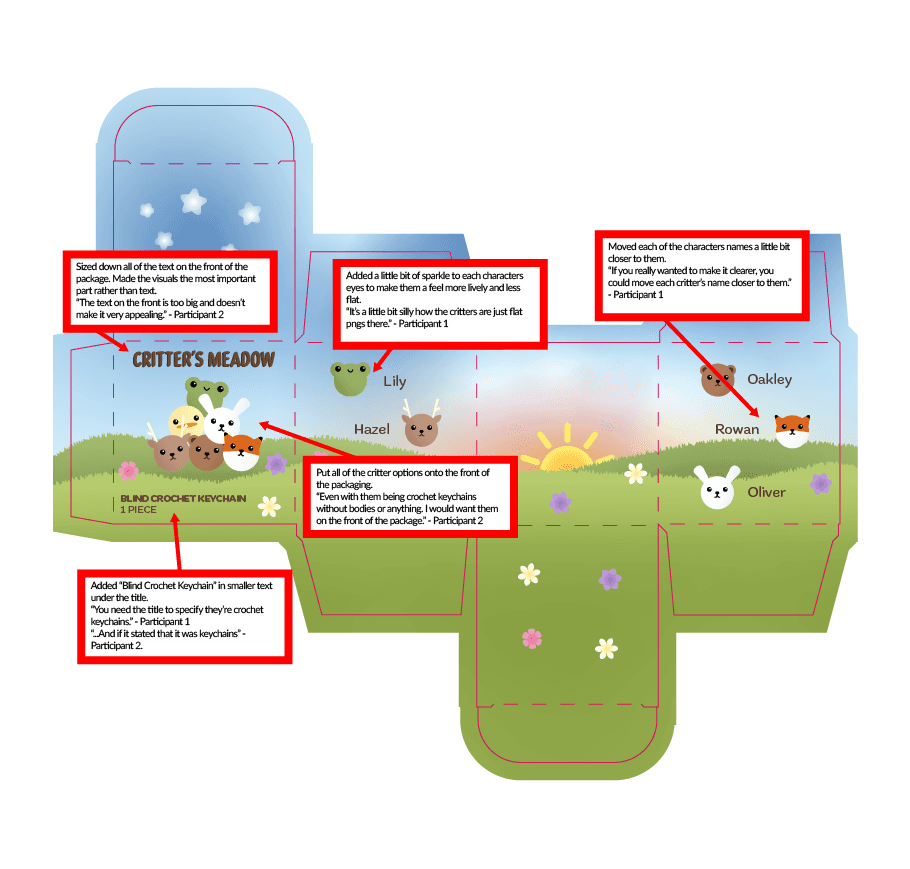
Iterating
Using my first version of the packaging design, I interviewed two different people. One being college and and the other a teenager, to get some insight about what worked and what didn't.


I then made changes to the packaging design referencing the notes I had taken during interviews. All changes included what was changed about them and the specific quote from the participant that encouraged that change to be made.
Creating the Mockup & Final Dieline
After iterations, I created a mockup within Blender. I ensured the box was accurate to it's real life size of a 3" cube.

Finally, I made some final touches like making some bumps on the cube to emulated embossing on a package before rendering the final mockup pictures.
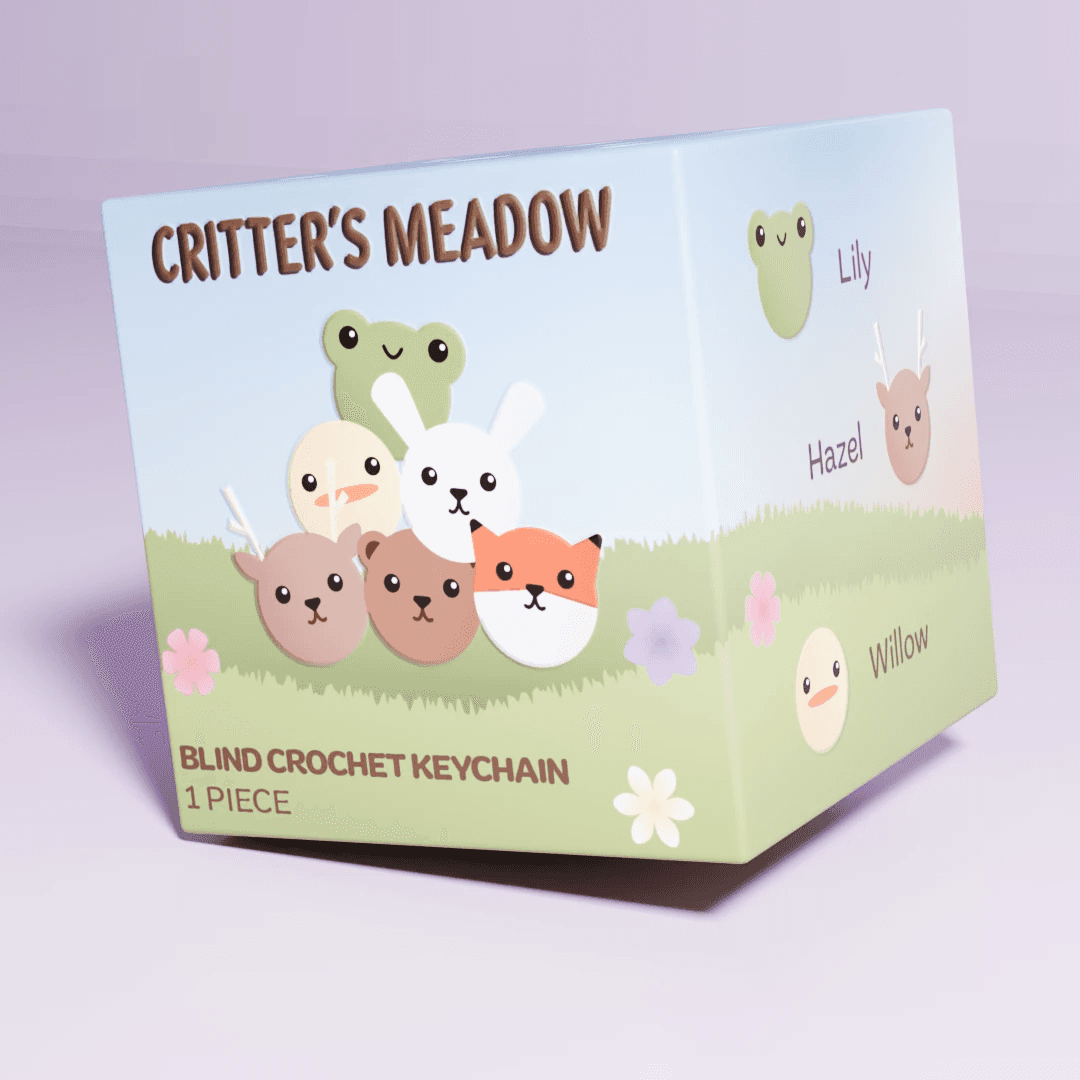

Pictured below is the final dieline after adjustments were made during the mockup process in Blender.

Conclusion
This project was definitely a passion project of mine but also an overall general learning experience. I got more experience with programs I already had some experience with, like Illustrator, while also getting experience with programs I had little to no experience with, like Blender. I am incredibly happy that I got to combine my interests with a learning experience to create a product I am proud of.